

How To Make Fire In Blender
Well-nigh people use very bright shaders when creating fire in Blender. Merely in many situations a more subtle approach works a lot better. This tutorial shows you lot how to get there!
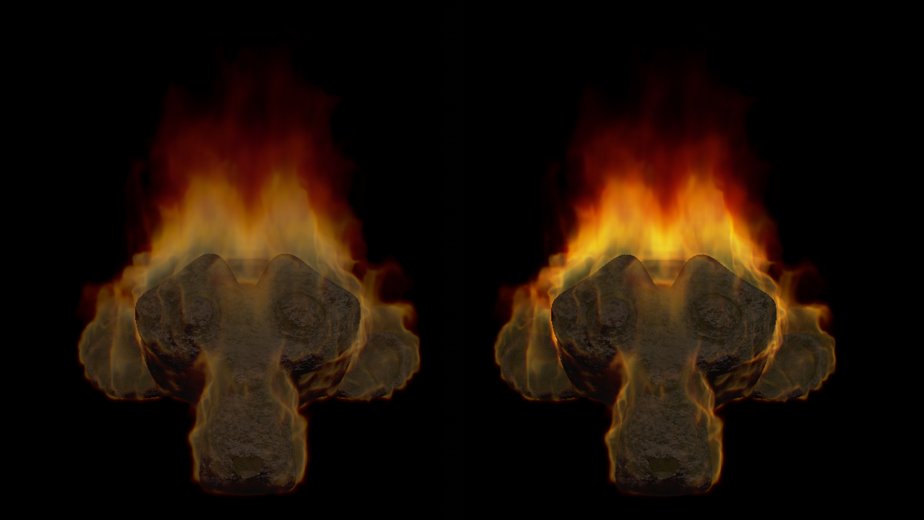
When looking at other people's fire creations done in Blender, I very often see that they use very brilliant shaders for their fire. That's of course cool for flame throwers and the likes, but very frequently an approach more subtle is more than suitable. By taking a expect at the following effigy yous might already get the idea. On the left a typical shader and on the right a less extreme i:

Every bit you see, working with the right corporeality of transparency is the fundamental to success. This tutorial will show yous how to achieve the look on the right plus some tips for easier tweaking of the wait using bones compositing. Prerequisite is that you already know how to create fire in Blender.
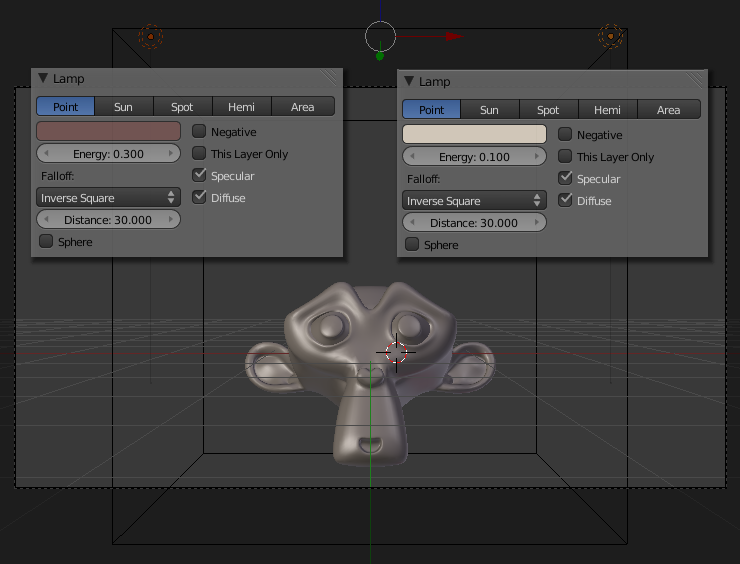
Scale the default cube up and gear up it to Domain in the smoke physics. So add Suzanne (Add together | Mesh | Monkey) and add together a subsurf modifier to her. For the lighting use surround lighting of 0.015 and two lamps in the top-front with slightly cerise color like in the next figure:
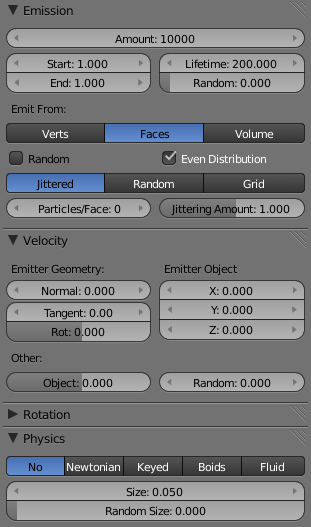
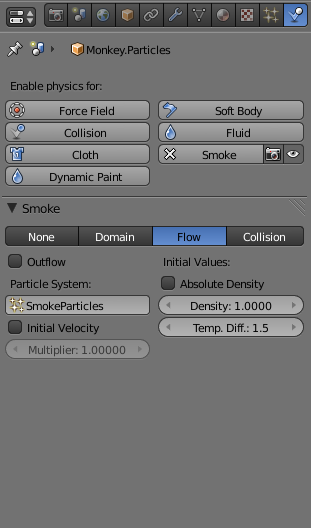
For the cloth and textures of Suzanne I used a uncomplicated setup for a rock material. No matter what kind of material you cull, most of import is that you lot set Recieve Transparent in the Shadow section of your material because otherwise information technology will evidence up completely black in the render due to the shadow of the domain. In the next ii figures you lot can find the settings for both smoke and particle system of Suzanne. The high amount of particles is used to cover her surface nicely. In the Catamenia settings the Temperature Difference is increased for faster rise burn down.
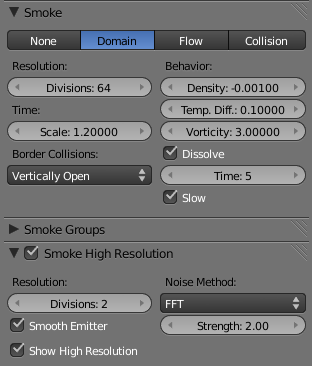
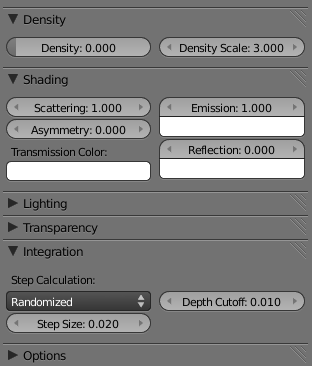
In the adjacent two figures y'all can discover the settings for the domain and the volume material of the domain. The Vorticity is fix to 3.0 for more movement of the flames. The Time Scale is also increased to make things fifty-fifty faster. Concerning the Volume Material, the Emission is just set to 1.0 rather than much higher values for brighter shaders.
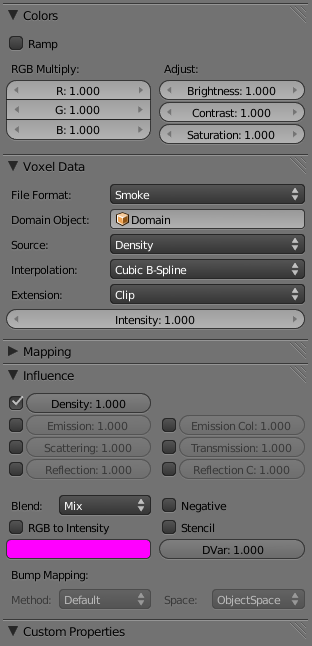
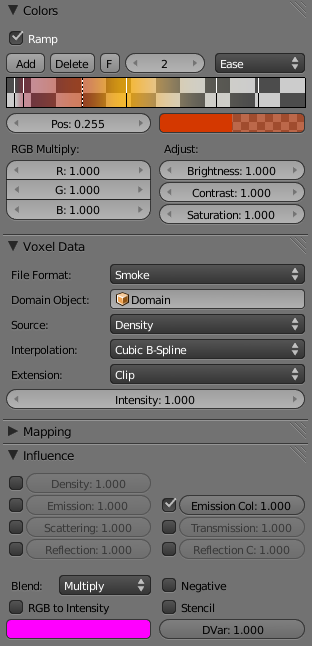
Next the settings of the two Voxel Information textures used to create the fire issue from the Blender fume simulation. The get-go one has the usual settings to prepare the density of the volume material co-ordinate to the voxel information of the simulation. The second i has the most important part of the setup - the color ramp that multiplies on the emission color. Discover information technology's got completely transparent parts on both ends and no part is fully opaque.
Of grade it makes a lot of sense to bake the smoke simulation before tweaking the settings of the voxel data textures. When working on the colour ramp y'all volition find that tweaking that office tin can exist a very time-consuming and boring chore. And so it makes sense not to tweak information technology to perfection since this volition mean aweful lots of re-rendering. A manner better idea is to use the compositor for the final tweaks. In the next figure yous come across on the left how things volition look like if you copy the in a higher place settings. On the correct you can see what can be changed by a petty use of the compositor:
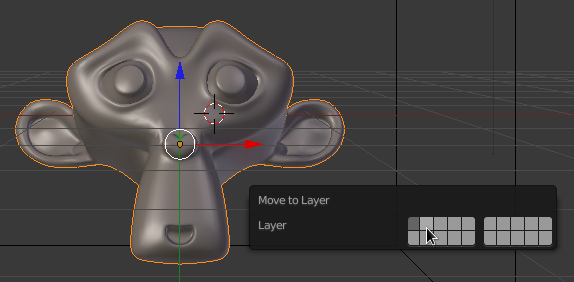
To be able to employ the compositor for changing the flame color and intensity, the rendering of the fire and the monkey head need to be seperated. Duplicate the current monkey head and move it to layer #ii by striking Thou and and then choosing the 2d slot.
Adjacent select both lights and hit G again. This fourth dimension hold downwardly Shift while moving them to the 2d layer. This way the lights will be visible on both layers. Next set up upwardly a system of two render layers for compositing. The next two figures show how they demand to exist ready to isolate the burn from the monkey caput:
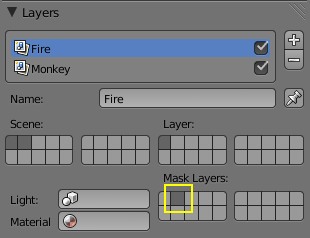

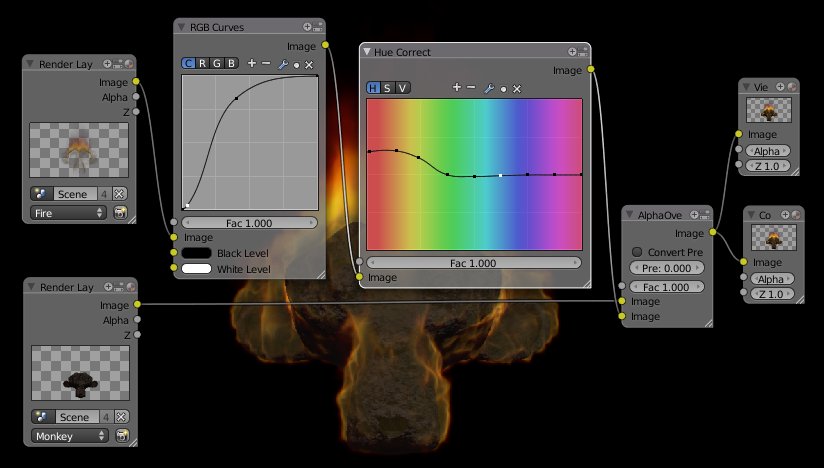
The monkey, which is on layer ii, needs to mask out the fire because otherwise the entire fire would be rendered on layer i. At present that the render layers are ready, re-combining them in the compositor is like shooting fish in a barrel using the AlphaOver Node. The cool affair is that you tin can easily add color correction just to the fire this style with instant feedback for every change:
You might as well want to add a glow upshot using the compositor. I did not because this burn down is but non very bright.
Download both Blendfile and Video in high quality here!
I'yard always curious how you put the effect to use, so if you did something cool with it, please besides post information technology in the comments. If you lot similar the consequence, head over to Nion's homepage and add a comment over at that place!
Related Items:

Source: https://www.blenderdiplom.com/en/tutorials/337-fireshader.html
Posted by: thompsonanciverivens1960.blogspot.com
0 Response to "How To Make Fire In Blender"
Post a Comment