

How To Make A Wooden Planter Box
POP Projects is a collection of new and classic projects from more a century of Popular Mechanics. Master skills, get tool recommendations, and, most importantly, build something of your very own.
This planter is designed to suit a range of skills, various tools, and different methods of working. Those who are up for a claiming will similar its subtle double taper: Cut parts square and so trim away a few whisper-fine shavings of wood for a furniture-quality fit. For a simpler version, do away with the taper, enlarge the bottom panel and lengthen the cleats there. The planter'due south board-and-batten construction accommodates either approach.
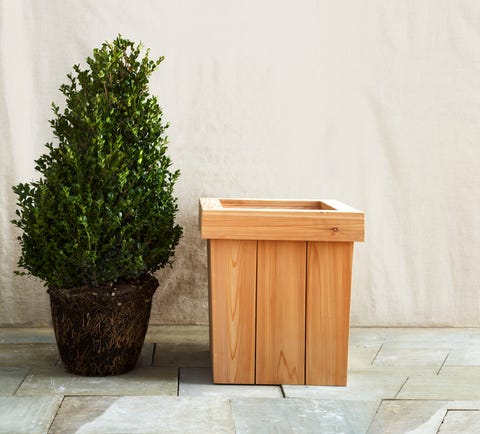
Apply a pot within to preserve the interior from degrading, or merely fill information technology with dirt and have the aging process gracefully. Nosotros congenital ours with certified sustainable western scarlet cedar, a woods that is responsibly harvested and will stand upward to the elements exterior your door.
Tools & Materials


The prissy thing about this planter is that you tin be fussy edifice it or kind of casual. Either option will upshot in an attractive project. Use nearly knot-free cedar, with parts carefully cut and fitted, to produce a planter with make clean lines and a furniture-like feel. Or, utilize a knotty rough-sawn cedar and dispense with careful adjustments to produce a rustic planter well suited to life outdoors.
For the former, you'll need a tabular array saw, a drill driver and a well-tuned plane.
For a rustic planter, a jigsaw will do, and the parts can exist assembled with sawn, rather than planed, edges.
The Plans

Making the Four Panels
Cut panel pieces to length and taper one border of each corner piece. If y'all accept a tabular array saw, make a tapering guide as shown in the drawing to hold the stock safely every bit you lot slide it along the saw fence [1]. Otherwise, cut the parts with a jigsaw. Annotation that i tapered piece on each panel is 11/16 in. narrower than the piece on the opposite side. This makes up for the thickness of the overlapping piece on the side by side side.
To ensure consistently shaped panels, build the planter sides on an assembly platform. Lay 3 panel pieces (ane straight and ii tapered) on a piece of plywood using 1/viii-in. spacers betwixt them. Fasten guide strips to the plywood to concur the parts in position [2].
Cut each cleat a pilus shorter than its theoretical length and fasten it to the panel side [3]. Inset the cleat by iii/4 in. to allow space for the adjacent side.
Box Assembly
Before assembling the planter, use a cake plane to slightly bevel the edge of the narrower tapered piece of each panel. Information technology should be a shade under 90 degrees. If you lot opt for a more than rustic-looking planter, skip this stride. Use a ring clench and some thin wedges to hold the panels together, then drive deck screws through the upper corners of the planter [4].
Next, bore a serial of 1/16-in. airplane pilot holes along the planter's corners and bulldoze a stop nail into each pigsty; don't bulldoze the nail into the side by side panel [5].
Remove the ring clamp and the screws; apply glue to the joints. Reassemble the box with the screws, and cease driving the nails [6]. Use a nailset and bulldoze each nailhead slightly below the surface so that it can receive outside-grade woods filler. Cut three lesser pieces and screw them into place.
Creating the Cap
Cutting the cap pieces and bore pilot holes for the finish nails used to concord them together. Place the pilot holes well away from where the miter cuts will be made. Gum and nail the pieces together [7].
Cut the miters on each L-shaped piece and dry assemble the cap using a band clamp to agree it together equally you bore pilot holes for the nails [viii]. Remove the clamp, apply glue to the miters, reclamp and fasten the cap assembly together.
Next, employ a block plane and lightly skim the cleat tops to produce a level surface. Position the cap with an even overhang, and diameter pilot holes into the cleats. Remove the cap, employ glue to the cleats and nail on the cap [9]. After the glue has dried, prepare the nailheads and apply wood filler. Sand all surfaces with 120- and 220-dust aluminum oxide paper.
Now, you're ready for some planting.
This content is created and maintained by a 3rd party, and imported onto this page to assistance users provide their email addresses. You lot may be able to find more information virtually this and similar content at piano.io

Source: https://www.popularmechanics.com/home/how-to-plans/a32882549/cedar-planter-box-diy-plans/
Posted by: thompsonanciverivens1960.blogspot.com
0 Response to "How To Make A Wooden Planter Box"
Post a Comment